|
|
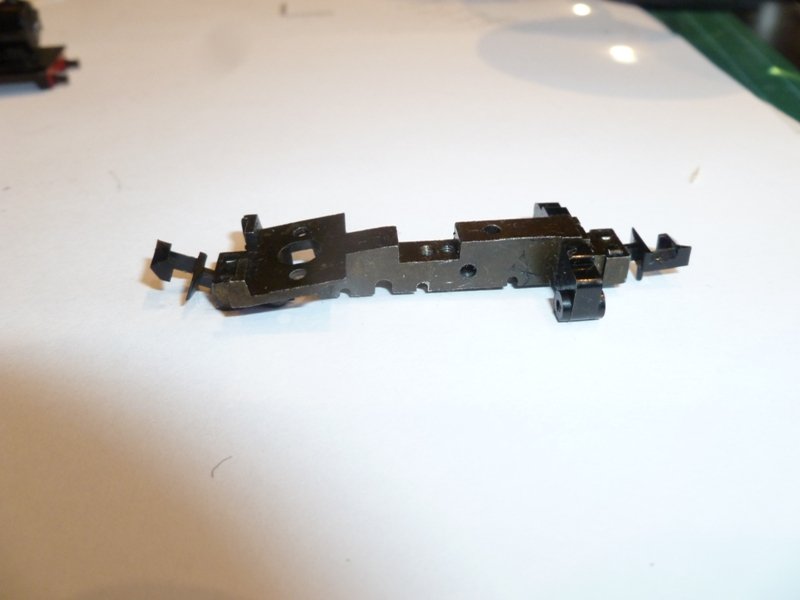
Clean the chassis - here shown before the motor has been replaced. The underside has half round slots for the wheels. The contact of the axle with the metal in these slots provides the electrical continuity for the negative side of the circuit (chassis and left side of the engine). Clean if necessary, but we don't want any rough surface here. |
|
|
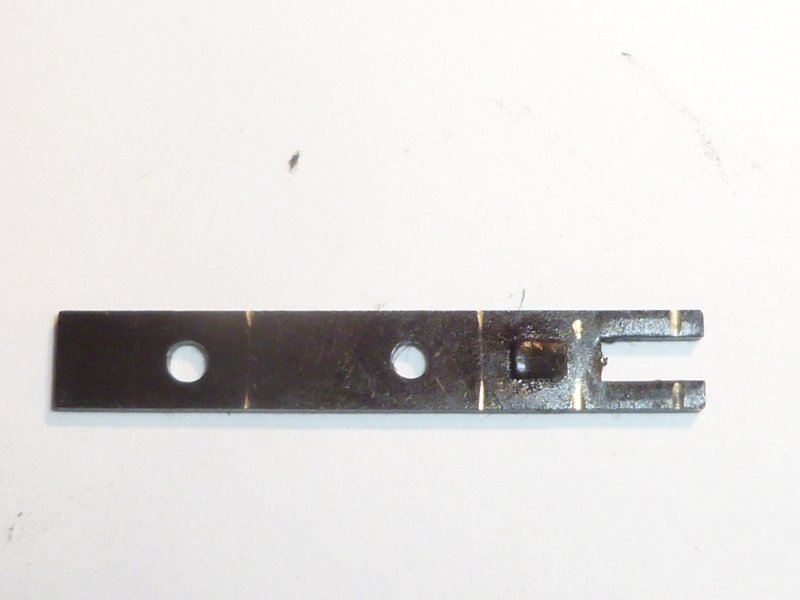
And while you are at it, clean the baseplate. Note which way up it goes - the plate is symetrical, except the side which faces the engine (rather facing the track), has a raised tag which slots into a recess between the middle wheel and the rear gear. (The light on the enlarged photo makes this raised tag look like a recess !) Note that wear from the axles has made the metal visible. THis isn't a bad thing - it all helps to make a good electrical contact. bewteen the axle and chassis. |
|
|
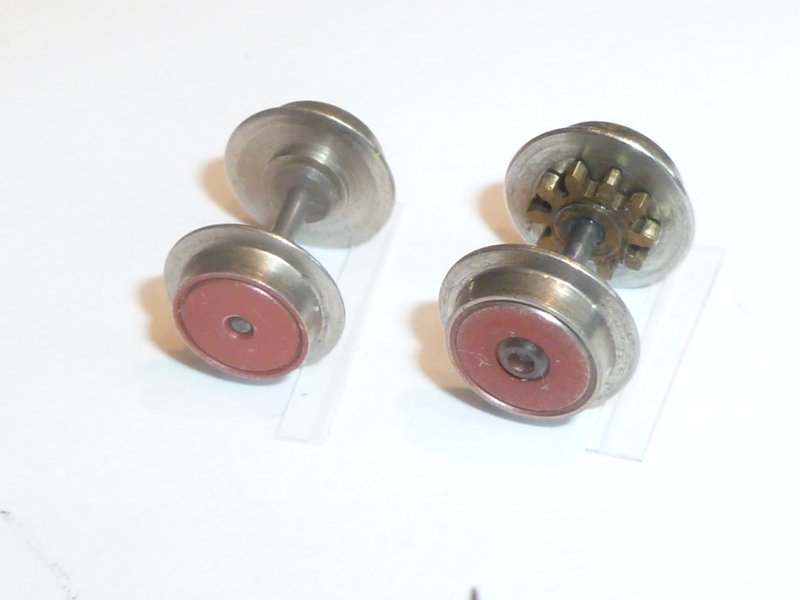
Recognise the orientation of the wheels. Here we have the front and middle axles, shown in different orientations for comparison. Note the position of the gear. Note the isolating hub shown on the axle on the right wheel in the picture. The gear goes on the left of the loco, the isolating hub on the right. But remember that the loco will be upside down when you put the wheel in !!! |
|
|
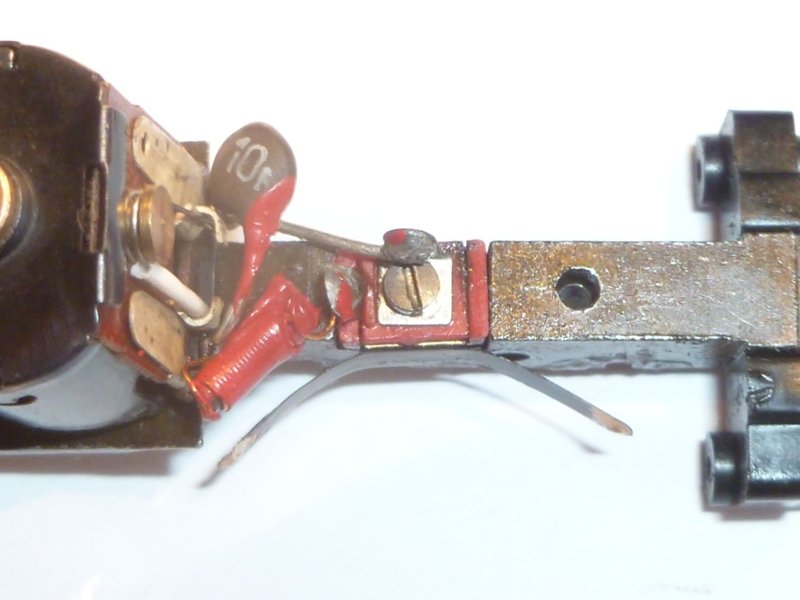
Clean up the copper strip - especially the contact point. Use a magnifying glass, or better still, a 10x hand lens. Bend the strip away from the chassis as shown. This provides a little extra springiness to keep the strip in contact with the wheels. |
|
|
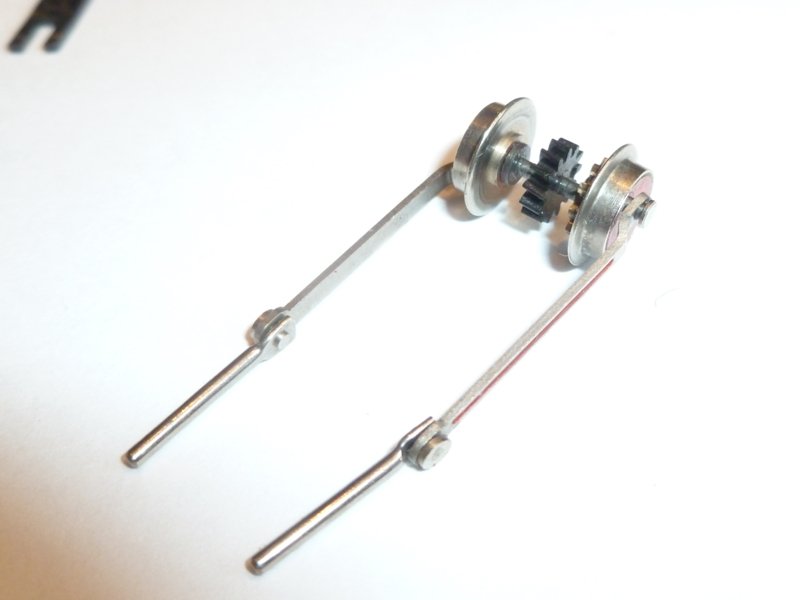
The rear wheels, conrod and pistons. I cant think of any reason why you would want to remove the linkage. The pin looks like a push fit,into the wheel, but to be honest, I didn't bother trying. Why risk breaking something ? Note the centre cog, the insulating hub and just visible, the 2nd cog on the left hand wheel. The photo shows the assembly in its correct orientation if the engine is facing the front of the picture. |
|
|
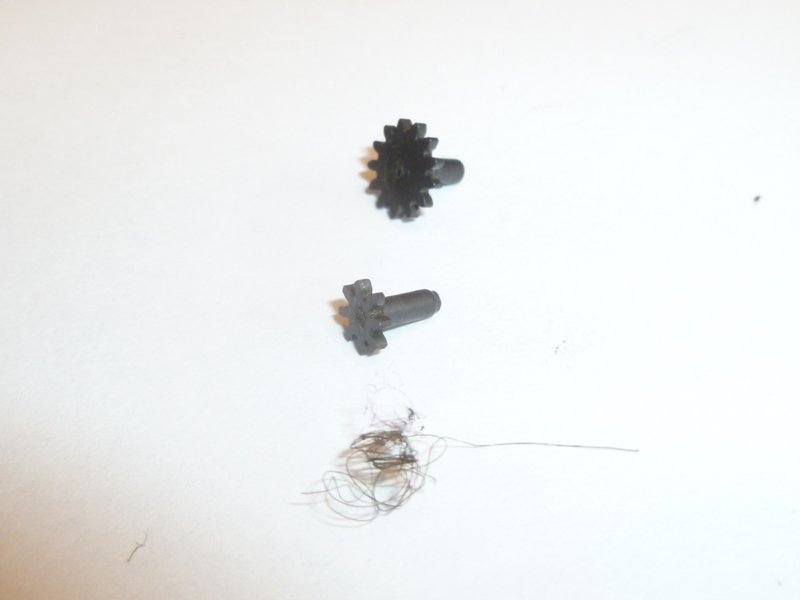
The cogs. Note that one is larger than the other. The larger one goes between the front and middle axles. The smaller one fits in front of the rear wheel set. Get a handlens and clean the accumulated hair with a pin or scalple blade. It is difficult to see with the naked eye, as it is often in the corner between the wheel and the axle. |
|
Now is a good time to apply a little grease to the working parts. Use the recommended stuff, but if this is unavailable a substitute is better than none at all. A very light smear in the half rounds of the chassis for the wheel and gear axles. A little more in the teeth of the gears - including the worm drive. Remember that too much will end up flying around the inside of the loco as the parts rotate at quite a high speed. Many motor failures are caused by oil and grease getting into the wrong places. |
Maintaining Classic UK Minitrix Locos
The Minitrix trademark is currently owned by Märklin Inc.
Gebr. Märklin & Cie. GmbH, Stuttgarter Straβe 55-57, D-73033 Göppingen,
Baden-Württemberg
Website ©2002-2018
JFHeath